Getting Started

Hello there!
Thank you so much for your interest on SpriteMancer! I'm still working on this documentation page so you might find that some sections are incomplete or missing. Please be patient, the full documentation will be available once SpriteMancer is released.
Useful links
-
Website: https://spritemancer.com
-
Steam's Page: https://store.steampowered.com/app/1858750/SpriteMancer
-
Roadmap: https://www.notion.so/codemanu/e9d17c49c5934be1a455627285fcf76d?v=2cca6f98bf9e4d9e97fbf4a30848da5e
-
Discord: https://discord.gg/azdqRf8
FAQ
I've saved a project or exported a creation but It's not appearing!
There's a known issue where Windows prevents SpriteMancer from saving to the app's root folder. Try a different one.
How can I input values into sliders manually?
You can use Left Ctrl + LMB to change any slider into an input field.
How can I reset a slider to its original value?
You can use RMB on most sliders (there are exceptions) to revert the value of that slider to the default one.
How can I modify a slider using the wheel with bigger/smaller increments?
While using the mouse wheel to change slider values, you can use SHIFT to move it at 10x the value and also ALT to move it at 0.1x the value.
I have a suggestion/bug report, how do I share it?
We have sections in our Discord community for bug reports and suggestions. You can join it here: https://discord.gg/azdqRf8
General
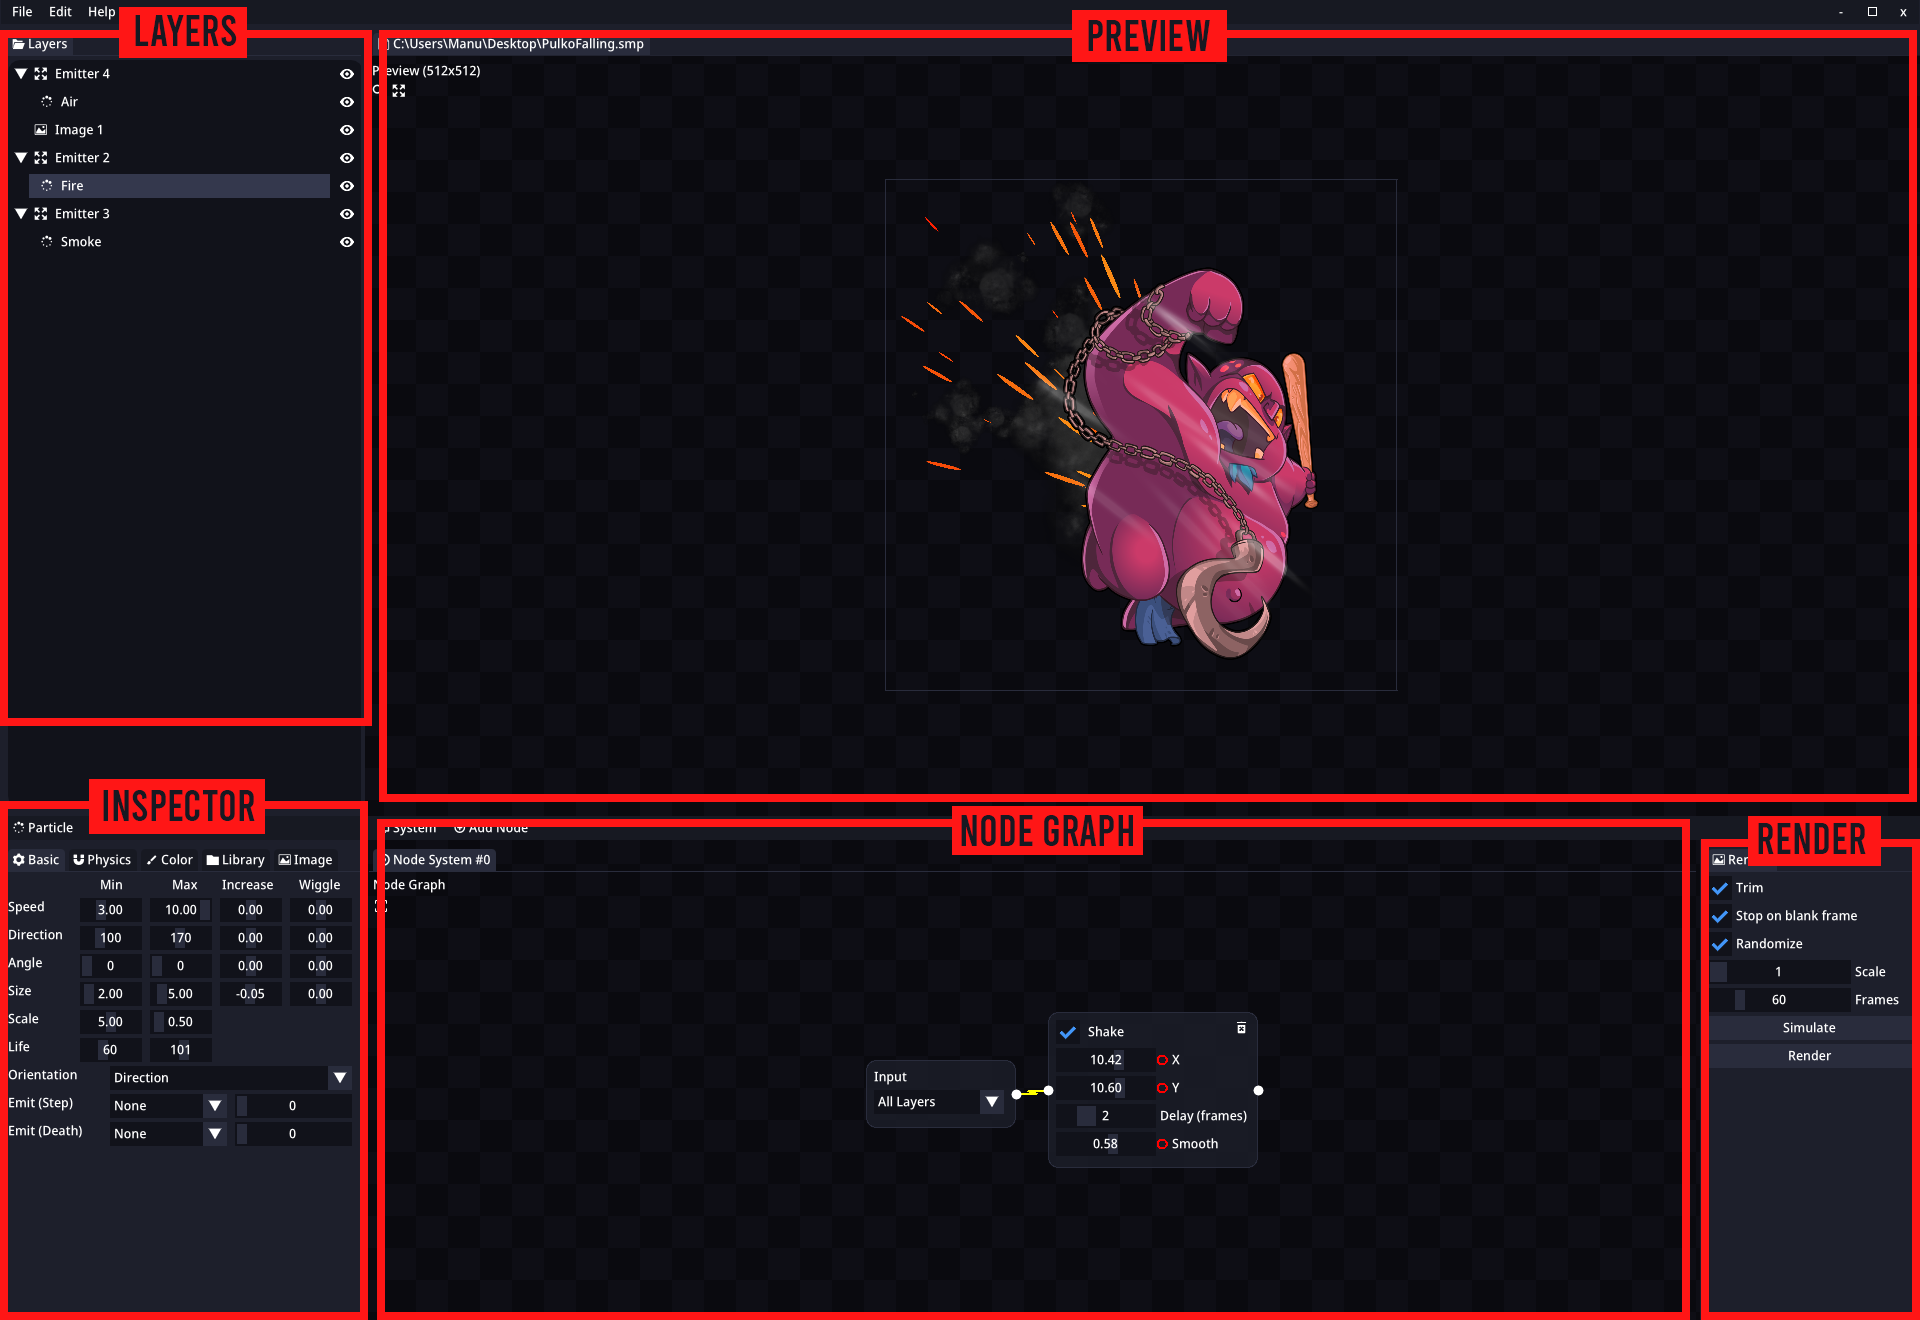
This section includes information about all the panels and features of SpriteMancer.
Sections
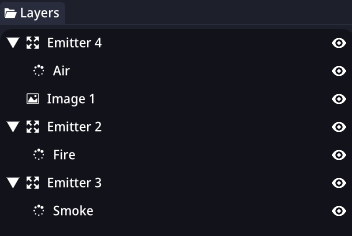
Layers
Layers are the bread and butter of SpriteMancer. Every tool available (except the Node Graph) needs to be in a layer.
Elements
To create any Elements, you can right click on an empty space in the Layers section and a Create popup will appear. You can then select any of the included Elements to be created in the selected layer (in case of Particles or Models) or in a new layer.
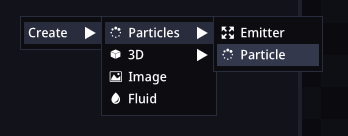
In SpriteMancer, the tools are called Elements:
Working with layers
Layers can be dragged around and moved freely. The order of the layers affect the render output and they are sorted in a way that top layers are rendered last.
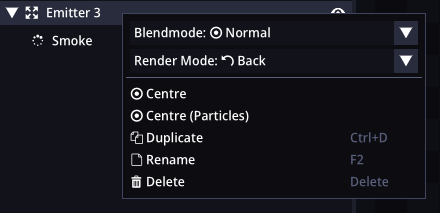
Right clicking a Layer show its context menu. The content of the context menu is different for each Element but they all have a Blendmode option included. This allows layers to be Additive or Subtractive.
Inspector
The inspector is the section where all the properties of the Elements are changed. The content of the inspector will change depending on which Element is selected.
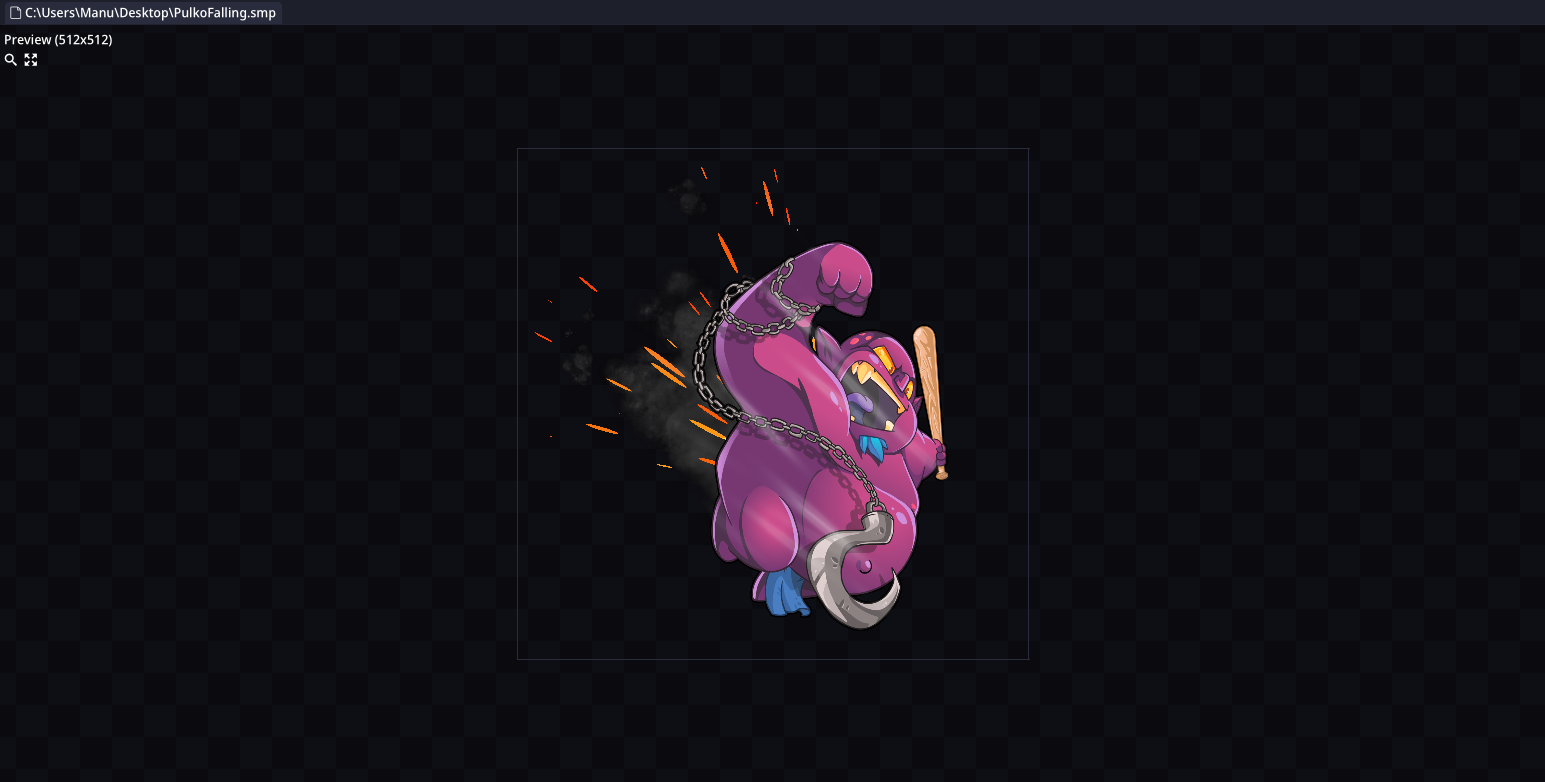
Preview
The Preview section is where the current animation is displayed. The preview displays some information about the animation and can be dragged around and zoomed in and out.
Controls
Apart from the controls in the upper left corner of the preview, you can use the following controls.
| Description | Inputs |
|---|---|
| Set selected Element position | Left Mouse Button |
| Move/Pan | Right Mouse Button |
| Reset position & zoom | Middle Mouse Click |
| Zoom in/out | Mouse Wheel |
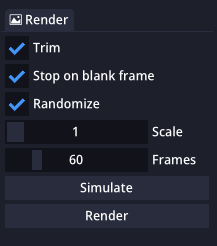
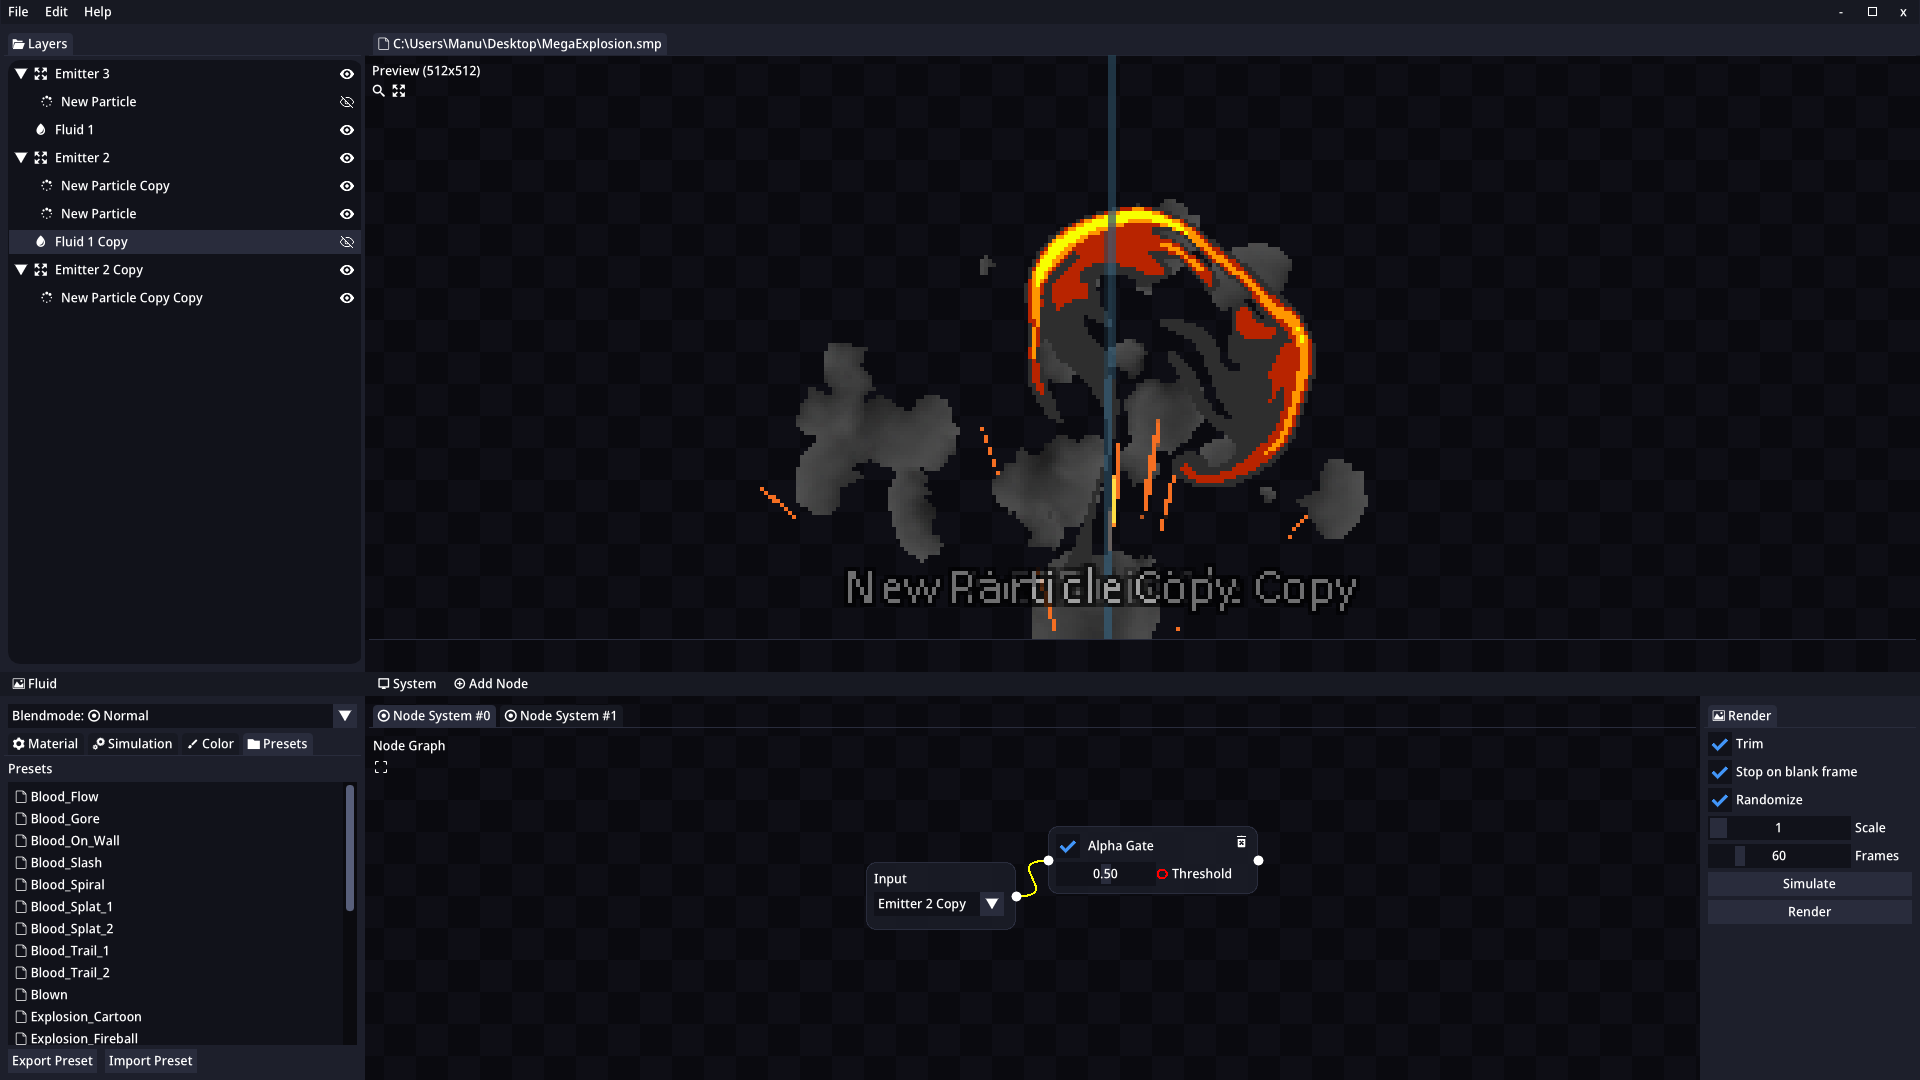
Rendering
This section is where the render is customized and performed. You can also simulate an animation here.
| Property | Description |
|---|---|
| Trim | Trims the final animation in order to get a smaller file size. |
| Stop on blank frame | Stops the rendering process if one of the animation frames is completely blank. It is recommended to leave it disabled if not needed, as the rendering process will be much faster. |
| Randomize | Randomizes each rendered animation. If disabled, an option to set the random seed will be available. |
| Scale | Scale will zoom the canvas and scale it down giving it a pixelated look. The canvas size is divided by the scale so the higher the scale value, the smaller the rendered animation will be. |
| Frames | The amount of frames that the rendering process will last. 60 frames is 1 second. |
| Simulate | Simulates the animation from the start point. Useful for animations using fluids, particles or burst dynamic animations. |
| Render | Starts the rendering process. |
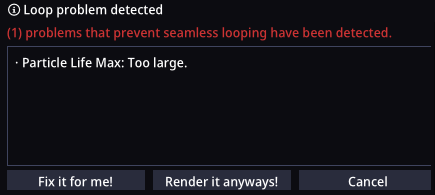
Rendering Problems
If a problem that prevents the animation for looping is detected, a popup will be shown that gives the user the option to force render the animation, or to try and fix the problems automatically.
| Property | Description |
|---|---|
| Fix it for me! | It will try to fix the problem that is impeding the seamless loop to be rendered automatically. |
| Render it anyways! | It will render the animation skipping any problems. |
Exporting
Exporting your creation is done in the Render Result window. Here some information about the animation and different options are available for better customization.10
📌 The Render Result window shares the same animation previewer as the Preview so it can be moved around and zoomed.
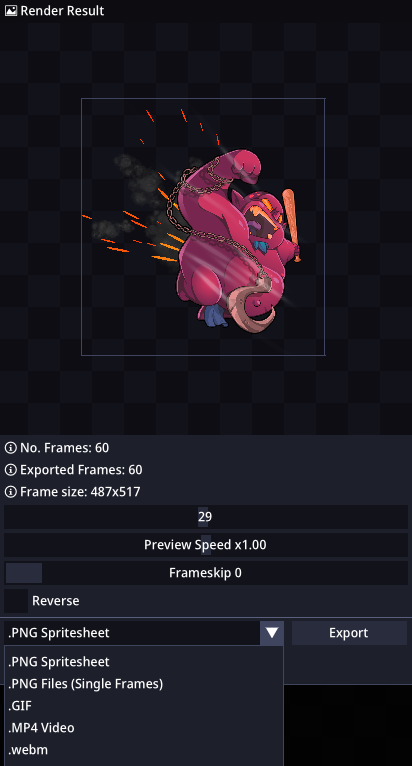
| Property | Description |
|---|---|
| No. Frames | The total number of frames the animation has. |
| Exported Frames | The number of frames that will be exported. This will change when using Frameskip |
| Frame Size | This is the final size of each frame of the animation. |
| Current Frame | The current frame of the animation in the preview. |
| Preview Speed | The speed of the animation in the preview. |
| Frameskip | The number of frames that will be skipped in order to reduce the final image size. |
| Reverse | Makes the animation to be played in reverse. |
| Export Format | Changes between all the possible export formats. This include: PNG Spritesheet, PNG Files, GIF, MP4, WEBM |
| Export | Exports the animation with the previous changes. |
Export Formats
There are currently 5 different support formats for exporting animations.
| Export Mode | Description |
|---|---|
| PNG Spritesheet | Exports the animation in a spritesheet, trying to be as optimized as possible. |
| PNG Files | Exports the animation into different PNG files for each frame. |
| GIF | Exports the animation into a GIF file. The exported GIF file doesn't support the alpha channel (at the moment), so the background will be opaque. |
| MP4 | Exports the animation into a video with MP4 format. |
| WEBM | Exports the animation into a video with WEBM format. |
Create
In SpriteMancer you will be able to create effects from scratch by using the already included tools and assets.
📌 This page will be updated when new elements are added.
Elements
Particles
Particles are little images that have properties like speed, rotation, color, etc. They are widely used in game's development to create different effect like impacts or miscellaneous ambience effects.
Particles need to be inside an Emitters that will be in charge of creating them.
General
| Property | Description |
|---|---|
| Min/Max | Sets the minimum and maximum values of the given property. |
| Increase | Modifies the value over time, it accepts positive and negative values. |
| Wiggle | Applies a sinusoidal wave to the value over time. |
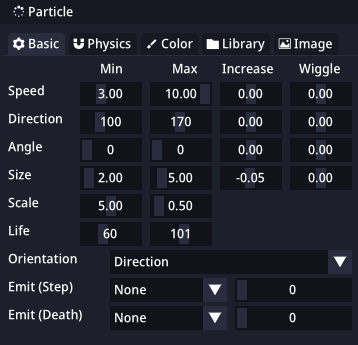
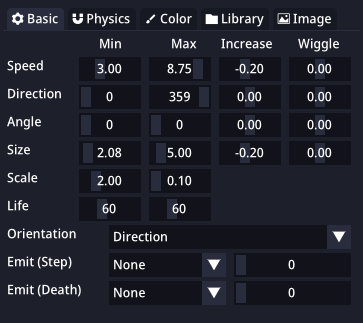
Basic
Here is where the basic properties of the particles are set. These include movement, transform and chain emitting.
| Property | Description |
|---|---|
| Speed | Defines the speed of the particles. |
| Direction | Defines where the particles will be heading towards. |
| Angle | Defines where the particle sprite will be looking at. |
| Size | Defines the size of the particle. |
| Scale | Applies a multiplier to the size of the particle to allow non-uniform scaling. |
| Life | The amount of frames the particle will be active. |
| Orientation Mode | Defines the particle orientation mode, while in Angle mode the particles will face the direction defined in the Angle property. While in Direction mode the particles will face the direction defined by the Direction property. |
| Emit (Step) | Each frame the particle is alive, it will spawn another particle defined by this property. |
| Emit (Death) | When the particle's life reaches zero, it will spawn another particle defined by this property. |
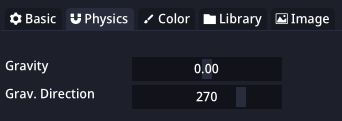
Physics
This is where the physics of the particles are defined.
🔨 Physics are very basic at the moment, but they will be expanded in the near future with collisions and more.
| Property | Description |
|---|---|
| Gravity | The amount of gravity applied to the particles. |
| Gravity Direction | The direction of the gravity applied to the particles. |
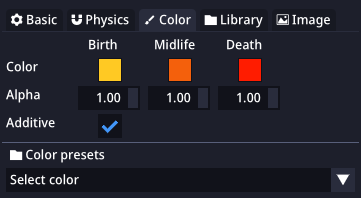
Color
This is where the particle colors are defined. There's also an included color preset library that can be used here.
| Property | Description |
|---|---|
| Color | Defines the color of the particle over time. |
| Alpha | Defines the alpha/opacity of the particle over time. |
| Additive | If checked, the particles that overlap inside the same emitter will have their colors added. |
| Color Presets | You can choose between some color presets for quick editing |
Library
Inside the library tab you will find a selection of 1000+ particle images already included in the app and ready to be freely used even commercially.

Image
In the image tab you can modify the origin point of the particle and also load your own images to be used by the particles.

Emitters
Emitters are the containers of particles, and the ones in charge of creating particles. Emitters have different properties to change how particles are created.
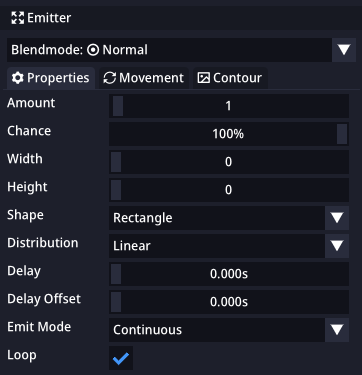
Properties
Here is where the basic properties of an Emitter are set. These include the amount of particles created at any time, the shape and distribution, and the different modes the Emitter can use.
| Property | Description |
|---|---|
| Amount | Defines the amount of particles that will be spawned each frame. |
| Chance | The chance for the emitter to spawn particles this frame. For example: If amount is set to 100 and chance is set to 50% there will be a 50% chance that 100 particles will be spawned this frame. |
| Width | The width of the region around the origin point that particles will spawn. |
| Height | The height of the region around the origin point that particles will spawn. |
| Shape | The shape of the emitter region defined above. The options are: Rectangle, Ellipse, Diamond and Line. |
| Distribution | The distribution of the particles spawned in the emitter region defined above. The options are: Linear, Gaussian, Inverse Gaussian. |
| Delay | The amount of time that has to pass before the emitter can spawn particles again. |
| Delay Offset | Offsets the delay by this time. This allows to create chain reactions for some effects, like fireworks. |
| Emit Mode | Emit mode defines how the particles are created in this emitter. Continuous makes particles spawn each frame. Burst creates a given number of particles before the emitter stops creating more particles. |
| Loop (Emit Mode = Continuous) | If Emit Mode is set to Continuous this option will be available. If Loop is checked, SpriteMancer will try to create a seamless loop when rendering this particle. |
| Burst (Emit Mode = Burst) | If Emit Mode is set to Burst this option will be available. Defines the number of particles that will be created before the emitter stops creating new ones. |
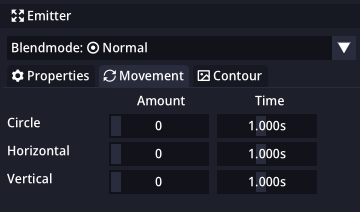
Movement
Moving the emitter overtime is an easy way to create certain effects, like a "Now loading" animation.
| Property | Description |
|---|---|
| Circle | Moves the emitter position over time creating a Circular shape. |
| Horizontal | Moves the emitter position over time from Left to Right. |
| Vertical | Moves the emitter position over time from Top to Bottom. |
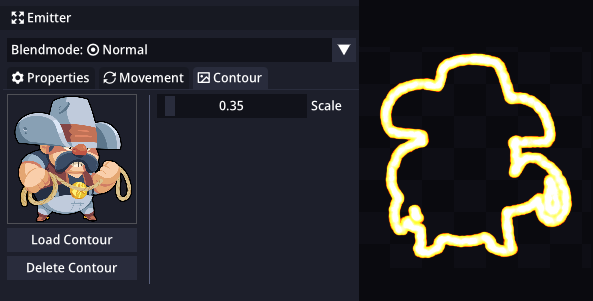
Contour
Contours are an easy way to create certain effects that you want to apply to an image, but only to the outer edge. SpriteMancer will analyze the given image to find the contour and particles will be created along the edge of the contour.
| Property | Description |
|---|---|
| Scale | Scales the contour region. |
| Load Contour | Loads an image to be processed and used as the contour region. |
| Delete Contour | Removes the current contour from memory. |
Fluids
Fluids is a SpriteMancer feature that simulates fluid pressure to create multiple effects like smoke, fires or explosions.
Material
The material is an image used to create the fluid. In most cases you will want to use the default image, but different images can be added to create all kind of effects.
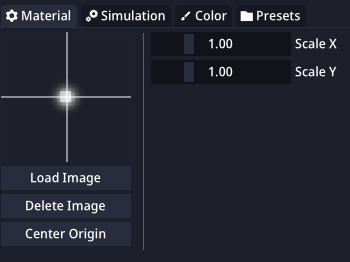
| Property | Description |
|---|---|
| Scale X | The horizontal scale of the material image. |
| Scale Y | The vertical scale of the material image. |
| Load Image | Loads an image to be used as a material. Only .png allowed at the moment |
| Delete Image | Deletes the current image material and reverts back to default one. |
| Center Origin | Centers the origin point of the image. |
Simulation
In this section there are all the properties that change the fluid behavior.
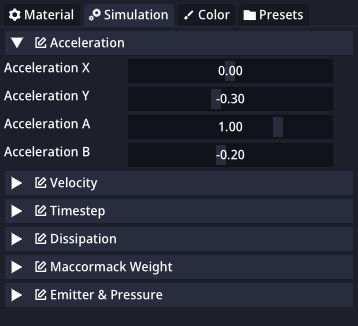
🔨 This section is under construction and will be expanded later, sorry!
Color
Fluids color is defined in this tab. The color ramp defines the colors that the fluid will be moving through.
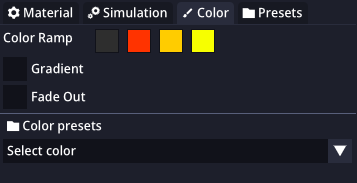
| Property | Description |
|---|---|
| Color Ramp | Defines the color ramp of the fluid. From outside to inside. |
| Gradient | If checked, the color ramp will use a gradient instead of solid colors. |
| Fade Out | If checked, the fluid will fade away instead of instantly disappearing. |
| Color Presets | You can choose between some color presets for quick editing |
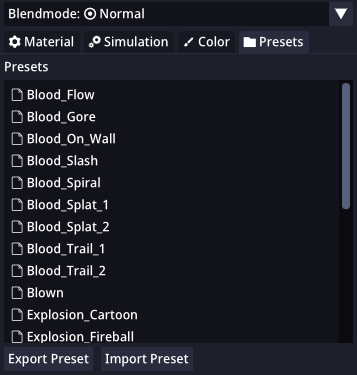
Presets
In the presets section there are multiple already included presets to get a starting point for creating your effects.
Images
In SpriteMancer you will be able to animate your images by using different effects and using the included dynamic animation system.
Toolkit
Properties
All Images have some basic properties so they can be setup before applying any animation or effects.
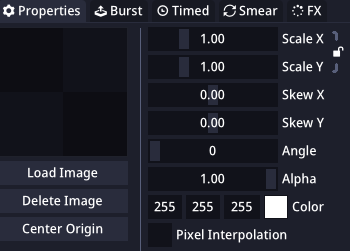
| Property | Description |
|---|---|
| Scale X | Defines the scale of the image in the horizontal axis. |
| Scale Y | Defines the scale of the image in the vertical axis. |
| Skew X | Defines the skew of the image in the horizontal axis. |
| Skew Y | Defines the skew of the image in the vertical axis. |
| Angle | Defines the rotation of the image. |
| Alpha | Defines the alpha/opacity of the image. |
| Color | Applies a color tint over the image. |
| Pixel Interpolation/Linear Interpolation | If enabled the image will be drawn applying Linear Interpolation which makes the image softer. Generally, you only want this to be enabled when working with non Pixel Art. |
| Load Image | Loads an image file into the Image element. (see Supported Formats) |
| Delete Image | Removes a previously loaded image from memory. |
| Center Origin | Center the origin of the image file. |
Dynamic Animations
Dynamic Animations are used to quickly animate images in a matter of minutes by tweaking values and adjusting sliders.
Toolkit
Burst
Burst animations are animations that are played just one time. This kind of dynamic animation allows the user to create effects like cutting a tree or an enemy being hit.
Scale
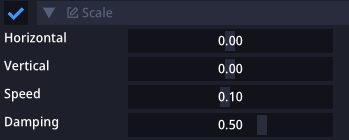
| Property | Description |
|---|---|
| Horizontal | The first impulse given to the image's scale on the horizontal axis. |
| Vertical | The first impulse given to the image's scale on the horizontal axis. |
| Speed | How fast the scale will go back to 0. |
| Damping | The damping of the animation. |
Skew
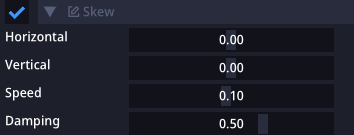
| Property | Description |
|---|---|
| Horizontal | The initial impulse given to the image's skew on the horizontal axis. |
| Vertical | The initial impulse given to the image's skew on the horizontal axis. |
| Speed | How fast the skew will go back to 0. |
| Damping | The damping of the animation. |
Rotate
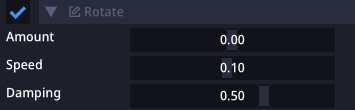
| Property | Description |
|---|---|
| Amount | The initial impulse given to the image's rotation. |
| Speed | How fast the rotation will go back to 0. |
| Damping | The damping of the animation. |
Shake
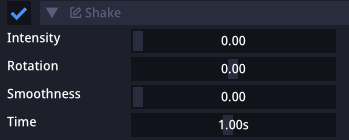
| Property | Description |
|---|---|
| Intensity | How much the image will shake. |
| Rotation | Adds a rotation component to the shake. |
| Smoothness | Make the changes in position of the shake instant or smoother. 0 = Instant. |
| Time | How long it takes for the shake to stop. |
Flash
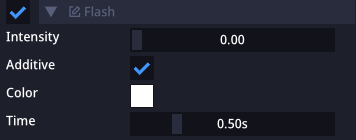
| Property | Description |
|---|---|
| Intensity | The intensity of the color. |
| Additive | If checked, the flash will be added on top of the image color. |
| Color | The color of the flash animation. |
| Time | How long it takes for the flash to stop. |
Timed
Timed animations are animations that are played constantly while the animation is active. This kind of dynamic animation allows the user to create effects like a tree being blown by wind or an animated UI button.
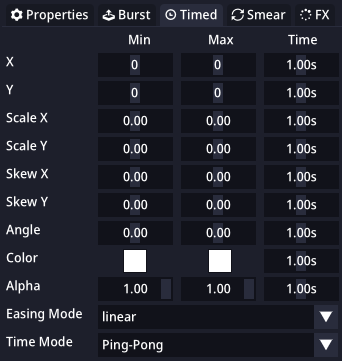
⚠️ Values can have different times, but be careful when changing time values if you want your animation to seamless loop!
| Property | Description |
|---|---|
| X | Moves the image on the horizontal axis. |
| Y | Moves the image on the vertical axis. |
| Scale X | Scales the image on the horizontal axis. |
| Scale Y | Scales the image on the vertical axis. |
| Skew X | Skews the image on the horizontal axis. |
| Skew Y | Skews the image on the vertical axis. |
| Angle | Rotates the image. |
| Color | Applies a color tint on the image. |
| Alpha | Modifies the alpha/opacity of the image. |
| Easing Mode | Applies an easing curve to all the properties that have time. (see easing.net) |
| Time Mode | Defines how Time handles. Ping-Pong makes time go forward and backwards. Continuous makes the time reset to 0 when it reaches the end. |
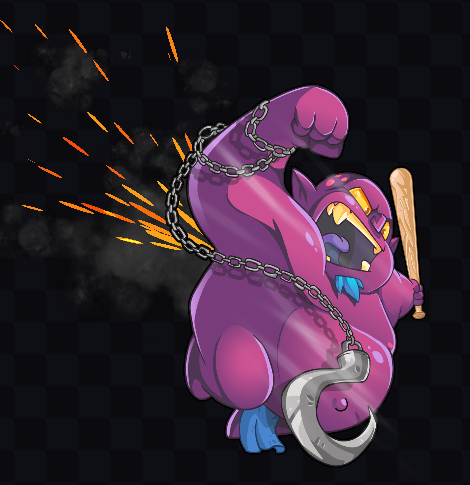
Smearing
Smear is when an animation leaves a "trail" behind that makes the image stretch from their previous position. This is a trick widely used in animation that makes it feel much more natural.
| Without Smear | With Smear |
|---|---|
 |  |
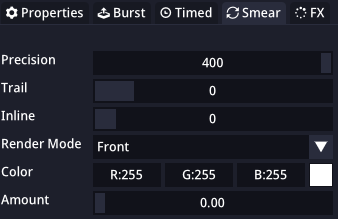
| Property | Description |
|---|---|
| Precision | The precision of the smear trail. Low precision will make the trail be more noticeable. |
| Trail | How long the smear trail will be. |
| Inline | If the image has an outline, setting an inline value bigger than the outline will make the smear only use the inside part of the image. |
| Render Mode | Defines where the trail is created. The options are Front and Back. |
| Color | Defines the color of the trail. |
| Amount | The amount of color applied to the trail. |
Effects
The FX tab contains different effects that can be quickly added to your images to create great animations with just a couple of clicks.
📌 This page will be updated when new elements are added.
Included Effects
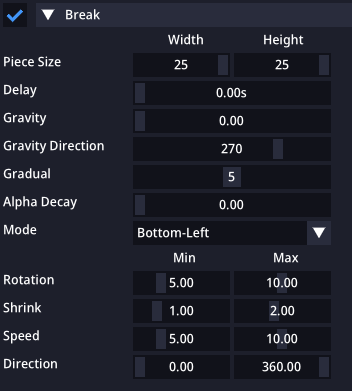
Break
The Break effect slices an image in multiple pieces and animates them creating what the community has called "The Thanos Effect".
| Property | Description |
|---|---|
| Piece Size | Defines in how many slices will the image be cut. Higher values means more slices. |
| Delay | Adds a delay before the image is sliced. |
| Gravity | Defines the amount of gravity that will be applied to the slices pieces. |
| Gravity Direction | Defines the gravity direction in degrees. |
| Gradual | Adds a delay between slices. Higher values means that slices take longer to be performed. |
| Alpha Decay | The alpha/opacity of the slices will be decreased by this amount each frame. |
| Mode | Defines the orientation of the slice. Also includes a Random option. |
| Rotation | Defines the minimum and maximum rotation speed of the slices. |
| Shrink | Defines the minimum and maximum shrinking of the slices. |
| Speed | Defines the speed of the slices. |
| Direction | Defines the direction of the slices. |
Supported Formats
- .png
Formats that will be supported in the future
- .gif
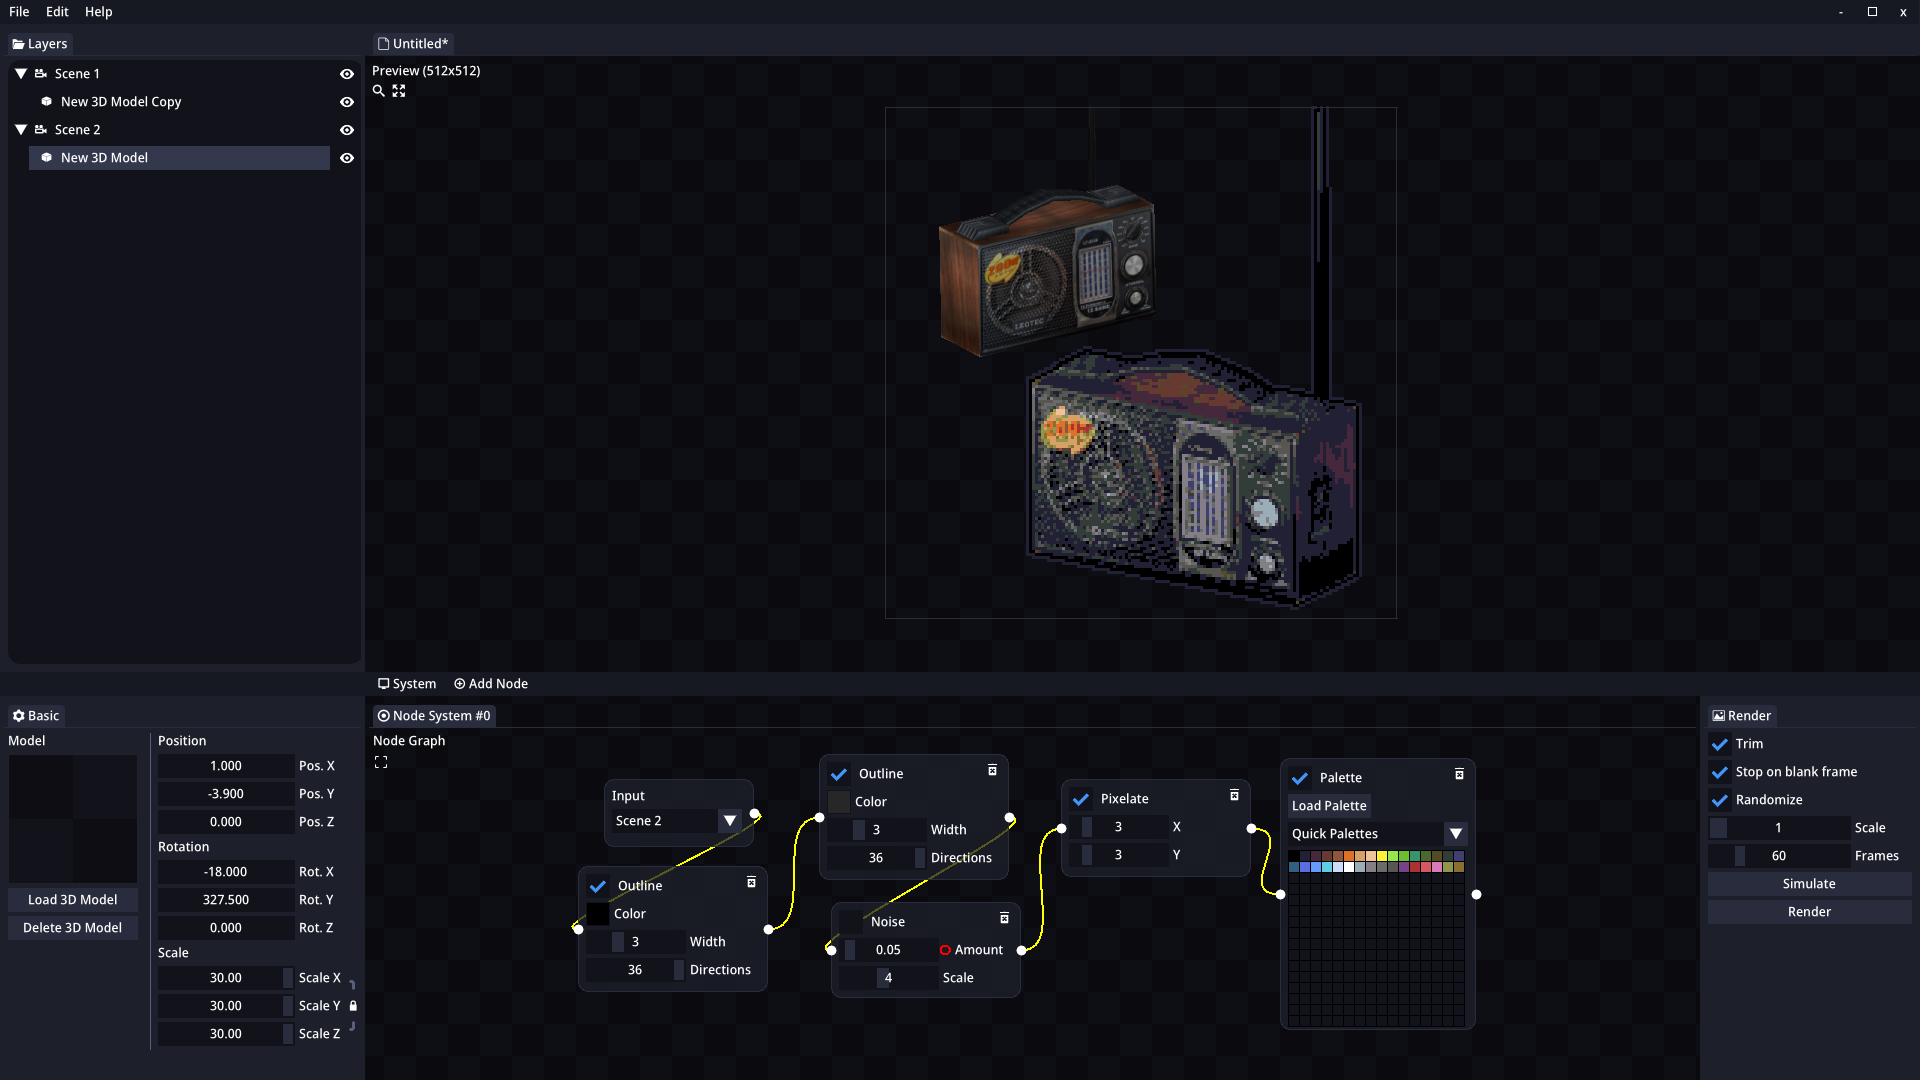
3D Support
SpriteMancer includes 3D Support where you can load models (see Supported Formats) and they will be rendered into a 2D space.
🔨 3D is basic at the moment, but it will be expanded in the future with animations and improved elements.
Elements
Models
Models are 3D Objects that get rendered to a 2D plane. Models need to be contained in a Scene that will be in charge of rendering them.
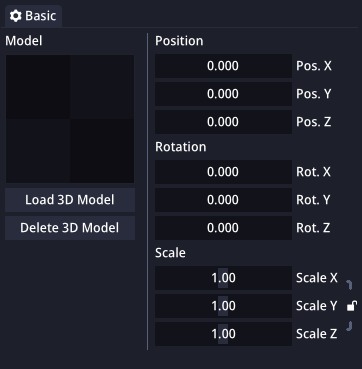
🔨 Model are basic at the moment, but they will be expanded in the future with transformation gizmos and more.
| Property | Description |
|---|---|
| Position X | Moves the model in the horizontal axis. |
| Position Y | Moves the model in the vertical axis. |
| Position Z | Moves the model in the depth axis. |
| Rotation X | Rotates the model in the horizontal axis. |
| Rotation Y | Rotates the model in the vertical axis. |
| Rotation Z | Rotates the model in the depth axis. |
| Scale X | Scales the model in the horizontal axis. |
| Scale Y | Scales the model in the vertical axis. |
| Scale Z | Scales the model in the depth axis. |
| Load 3D Model | Loads a 3D model (see Supported Formats) into the Model element. |
| Delete 3D Model | Removed the previously loaded 3D Model from memory. |
Scenes
Scenes are the ones in charge to render the 3D Objects inside.

🔨 Scenes are basic at the moment, but they will be expanded in the future with lighting and more properties.
| Property | Description |
|---|---|
| Camera Mode | Changes the camera rendering mode. The options are Orthographic and Perspective. |
Supported Formats
- .obj/.mtl
Formats that will be supported in the future
- .fbx